This Admin Guide is intended for use by business users that managing their business' buyers via Skava's Accounts microservice.
Overview
The Accounts microservice ("Accounts") allows Accounts Admin/Accounts Rep to create and manage Business to Business (B2B) accounts for its clients. For a detailed overview of the Accounts microservice, see Accounts Microservice.
Accounts Glossary
-
Business or Organization - the parent of a store or set of stores. The basic use of a business is to manage common sets of users, catalogs, and other services for the stores associated with the business.
-
Business Admin - a role that manages business settings, creates and manages stores, and enables microservice(s) for a business.
-
Catalog - a container for the set of information about individual products and stock keeping units (SKUs) for a store.
-
Catalog Manager - creates, manages, and approves changes to catalogs.
-
Customer- a business consumer or buyer on the Business' B2B storefront.
-
Price Lists - a container or wrapper entity to hold the prices of multiple stock keeping units (SKUs) available for sale to a consumer or buyer.
-
Pricing Manager - creates and edits price lists, approves and denies data submitted by pricing editors, and manages currency and price types used by a price list.
-
Product - a good, service, or idea that has a combination of tangible and intangible attributes and can have multiple variants which are referred to as stock keeping units (SKUs). In Skava Commerce, the consumer/buyer evaluates a product (for example, a men's dress shoe available in black and brown and in sizes from 10 to 15), but actually purchases a SKU associated with the product (for example, a black colored version of the dress shoe in size 12) rather than the product itself.
-
Stock Keeping Unit (SKU) - a particular variant of a product which is available for purchase by a consumer/buyer.
-
Store - represents a specific physical location or online store of a business.
-
Storefront - a consumer-facing website that presents products, content, and promotions across multiple channels such as desktop, tablet, and mobile.
Accounts (B2B)
Accessing the Accounts Console
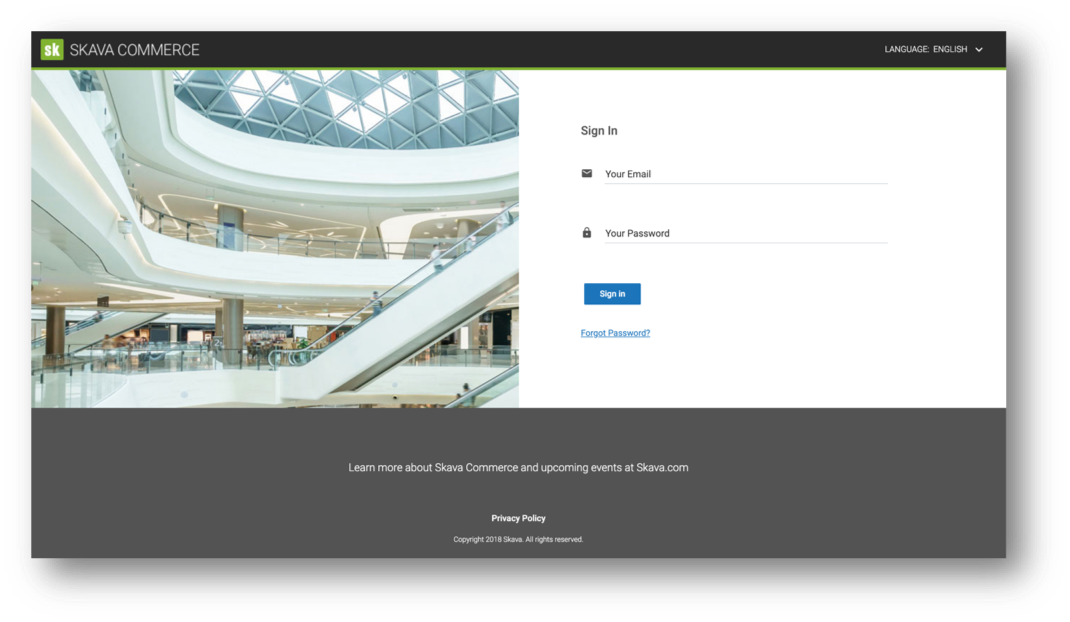
- Login to the Foundation server for your business (URL provided by Skava).
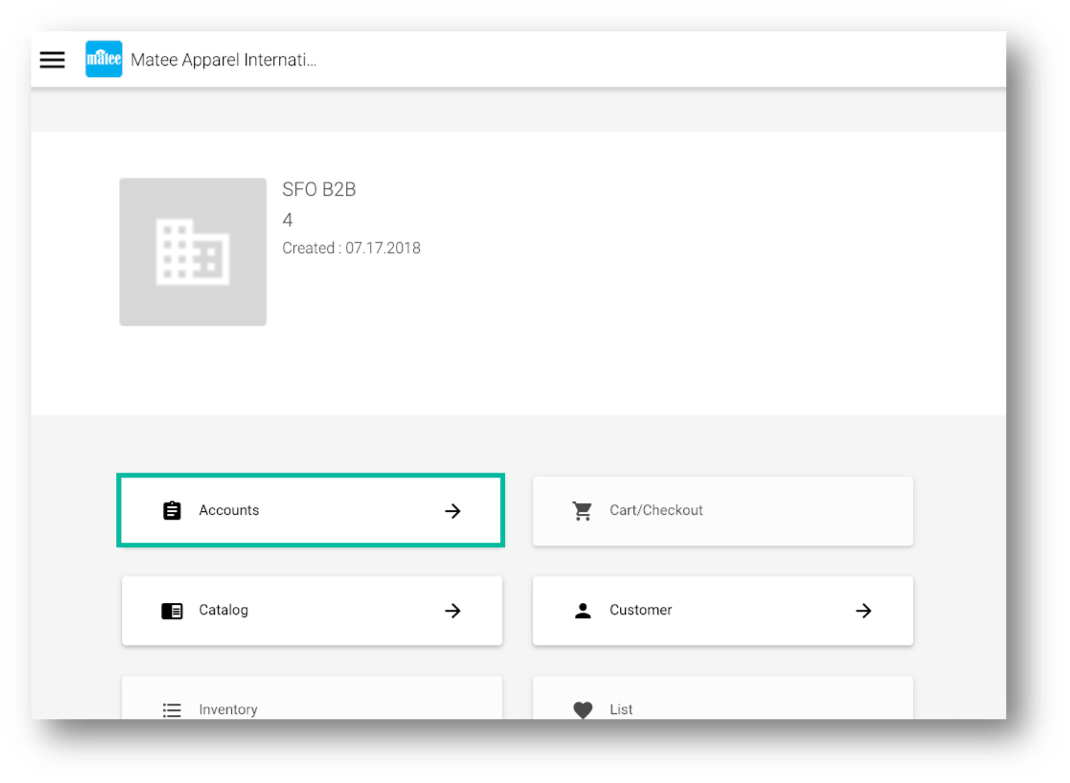
- Click the Accounts option from the StoreOps screen.
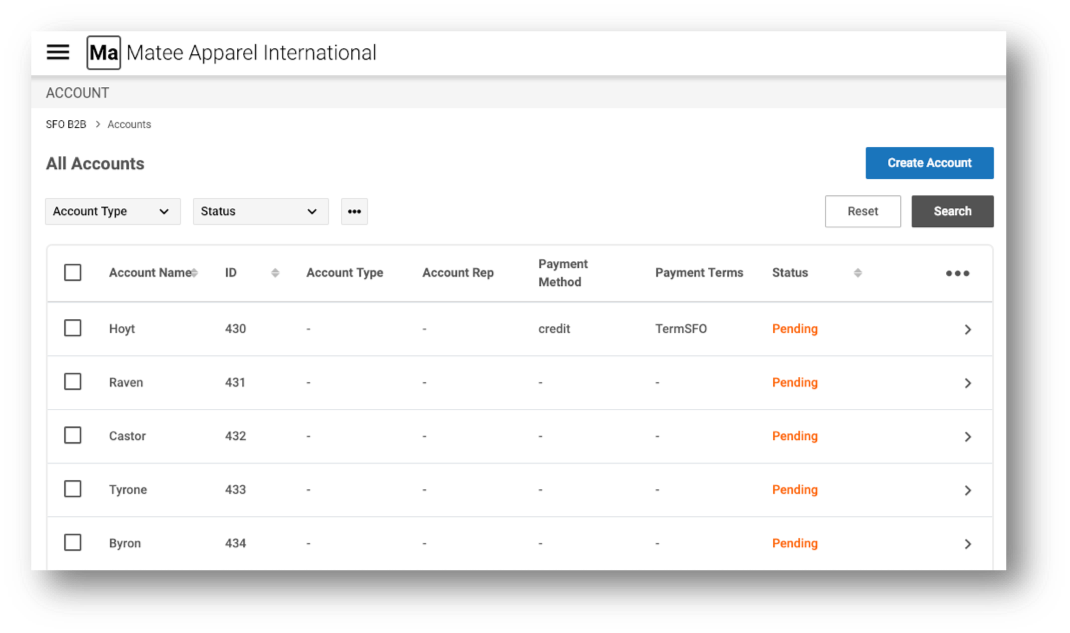
- Manage Accounts from the Accounts Console for your store(s).
Manage Accounts
Accounts Console
-
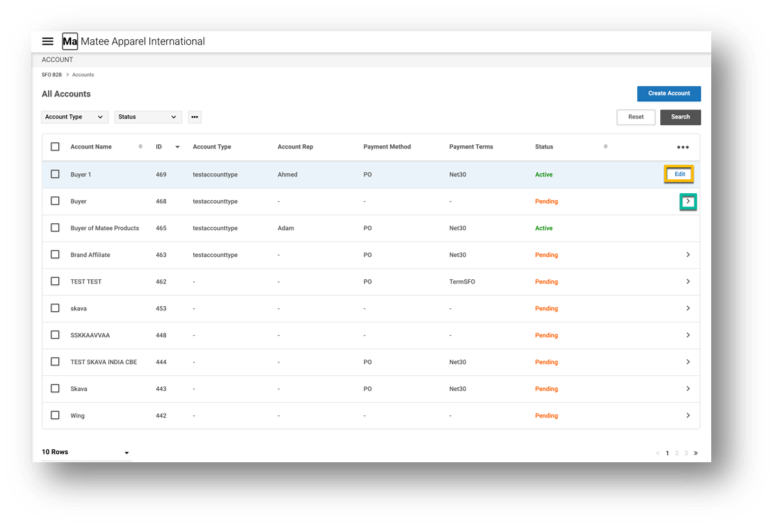
The home screen of the Accounts Console will contain a list of all Accounts for a store.
-
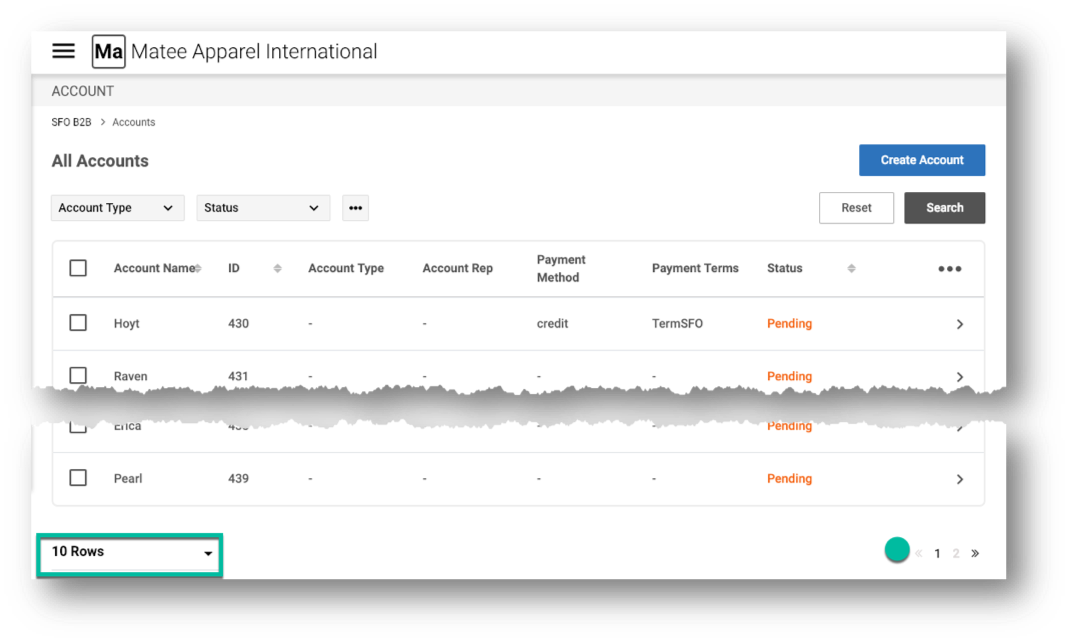
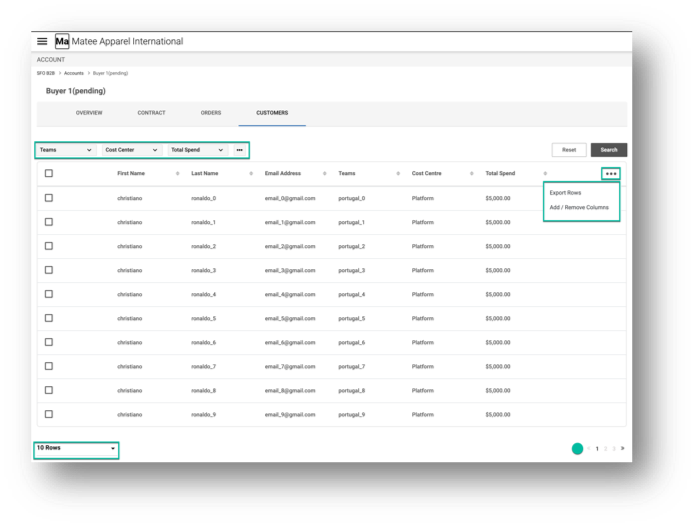
By default, 10 accounts per screen will appear, but it can be increased to 25 or 50 by clicking the Rows dropdown at the bottom left of the screen.
-
Navigation to additional screens is easy with the pagination option that appears at the bottom right of the screen.
Note: Rows per screen and pagination options are available on all screens containing data in rows.
-
- In addition to using the back button, Accounts Managers can navigate back to the homepage of the Accounts Console by using the breadcrumbs at the left top of all screens.
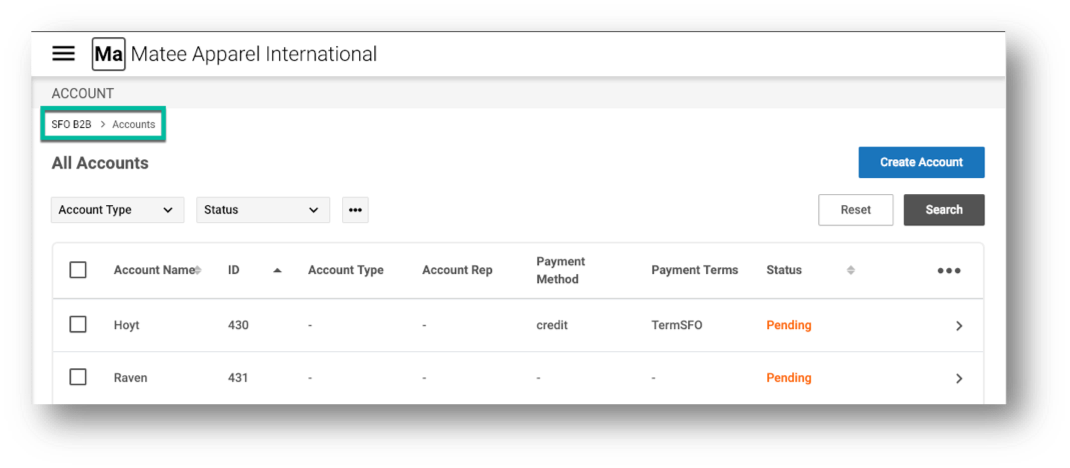
Search for Accounts
The Accounts screens include options for searching the accounts as well as exporting rows of accounts.
-
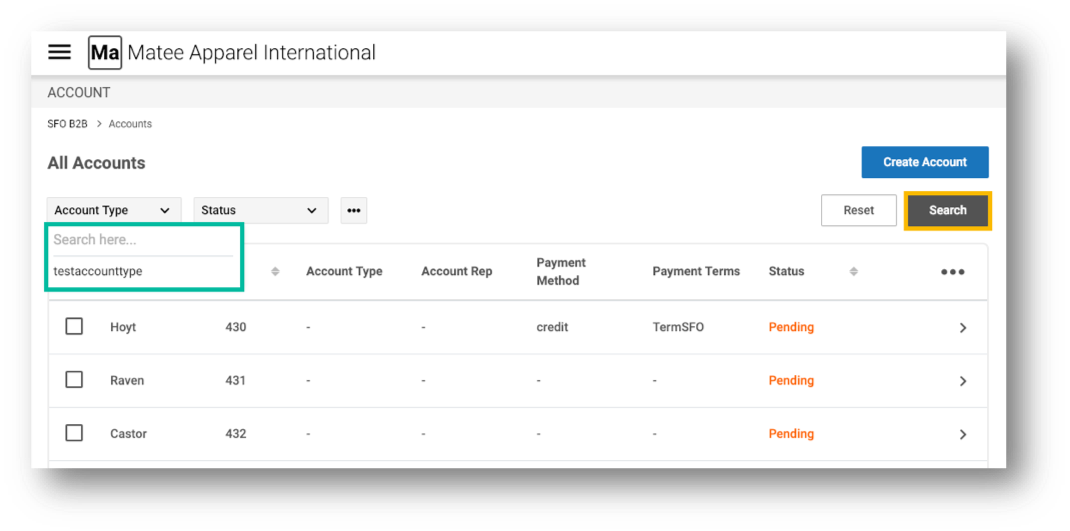
Click the dropdown on the Account Type header to open the entry field to provide a search criteria.
-
Enter the desired search data and click the Search button when done.
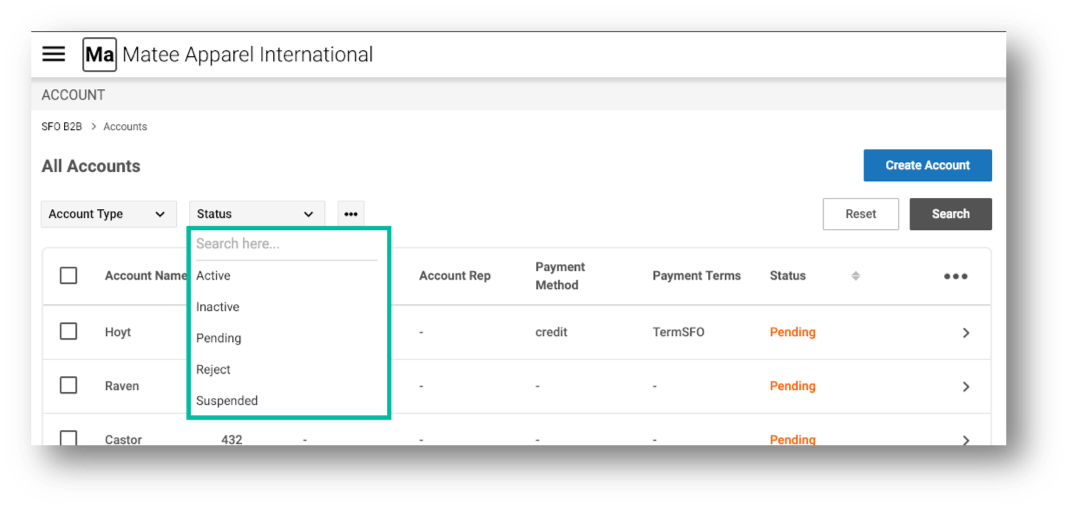
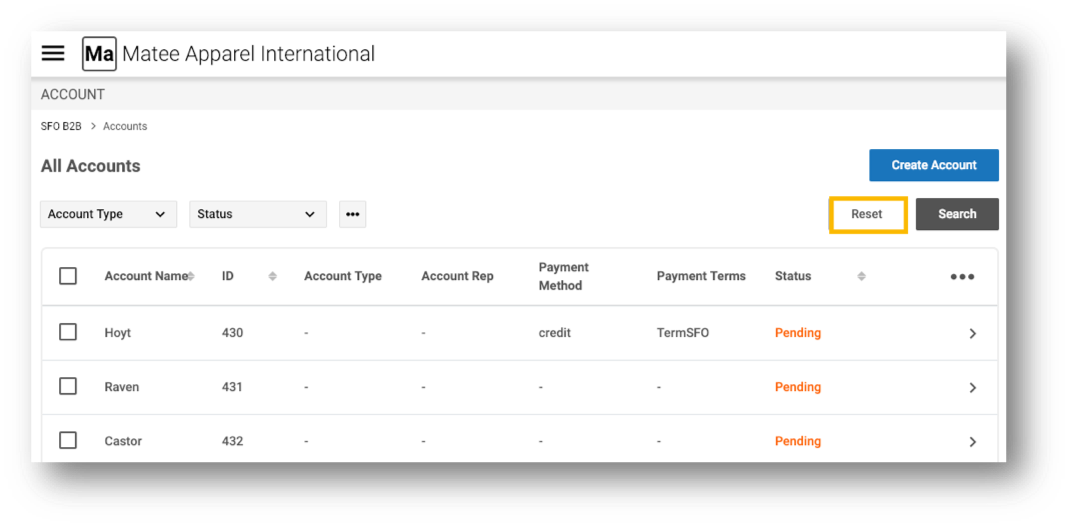
- The search results list can be restricted by status (i.e. Active, Inactive, Pending, Reject, and Suspended) of Accounts by clicking the Status header and selecting the desired restriction. Note: The default is all the records match with the search field criteria irrespective of the status.
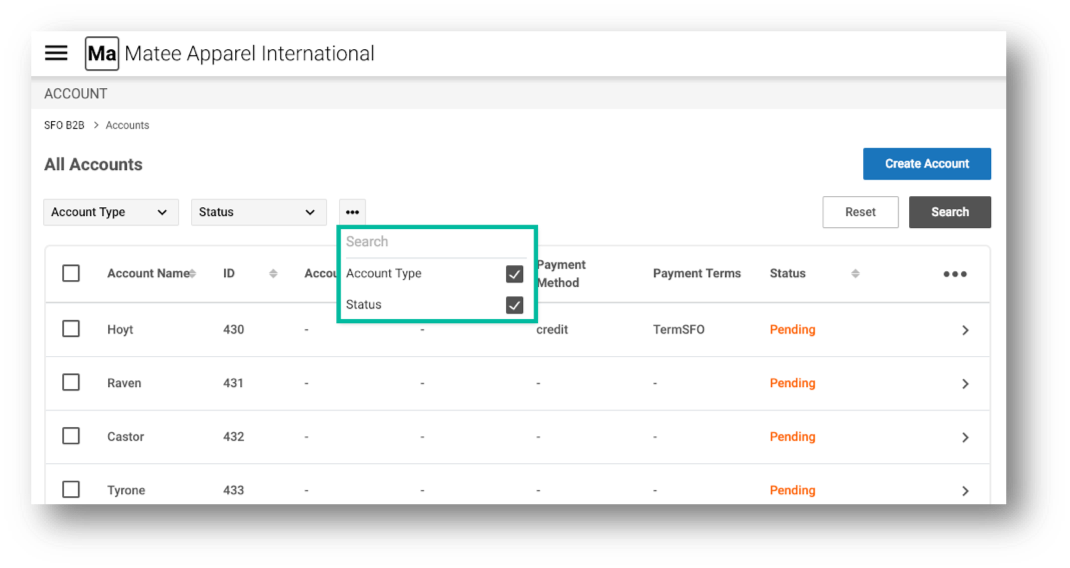
- The available searchable fields list can be edited by clicking the ellipse at the right of the Status search field and then checking or unchecking the items in the list.
- Click the Reset button at the left of the Search button to reset the search criteria so that all the records appear in the results list.
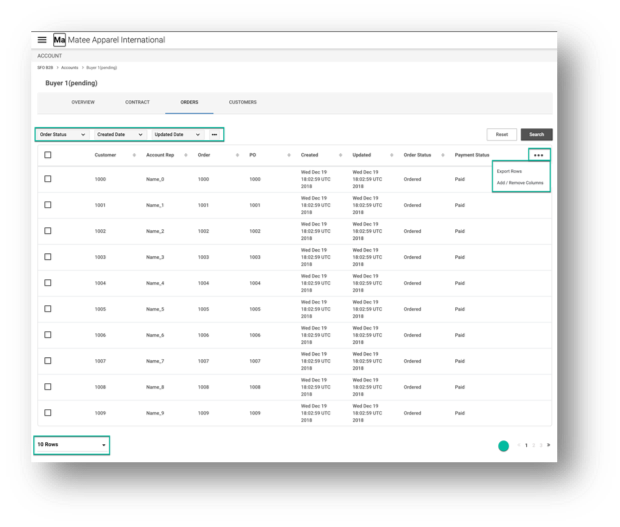
Export Lists of Accounts
Within the Accounts home screen, Accounts Managers have the option to export lists of accounts data including account name, ID, account type, account rep, payment method, payment terms, and status.
-
Click the ellipse just below the Search button to expose the export options.
-
Click the Export Rows option in the modal to export rows of Accounts data to an Excel spreadsheet.
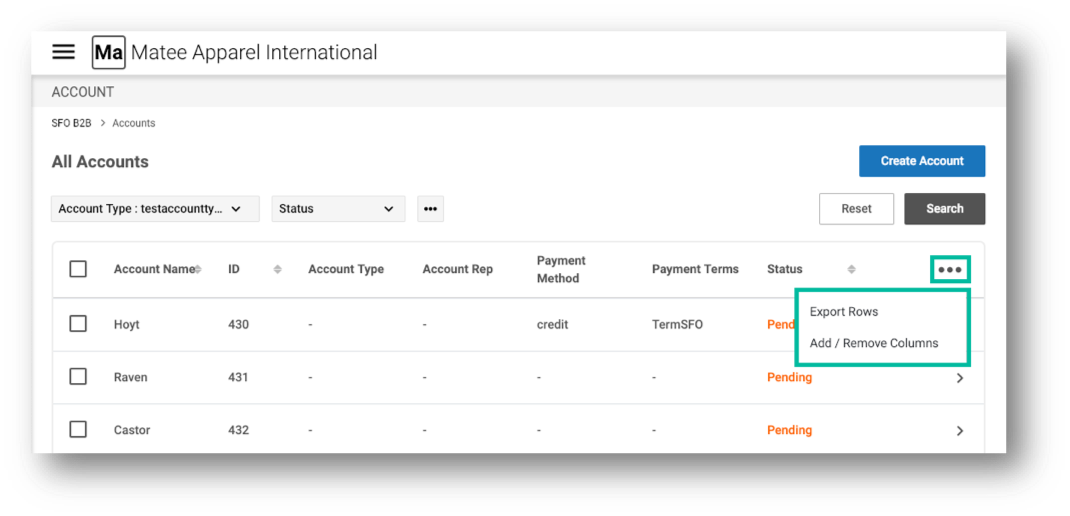
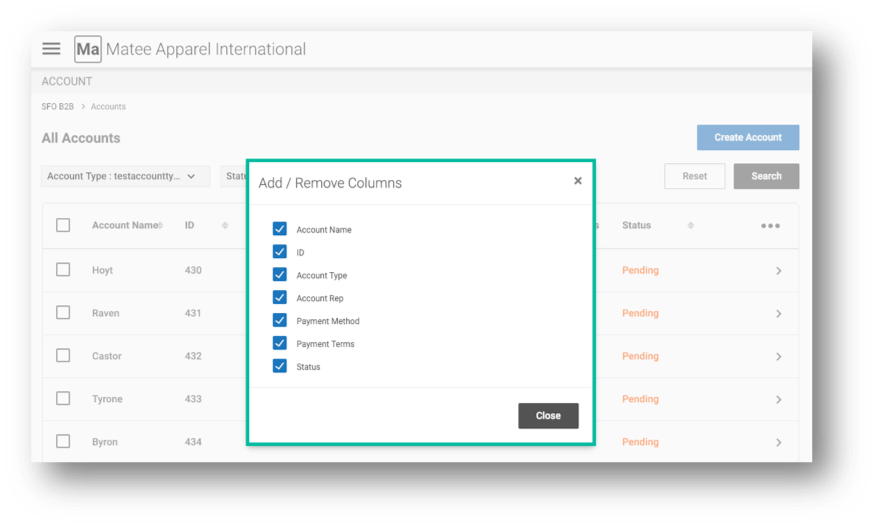
- Accounts Managers can also specify a list of fields that will be displayed and exported by click the Add / Remove Columns option in the modal and the checking or unchecking of the desired fields.
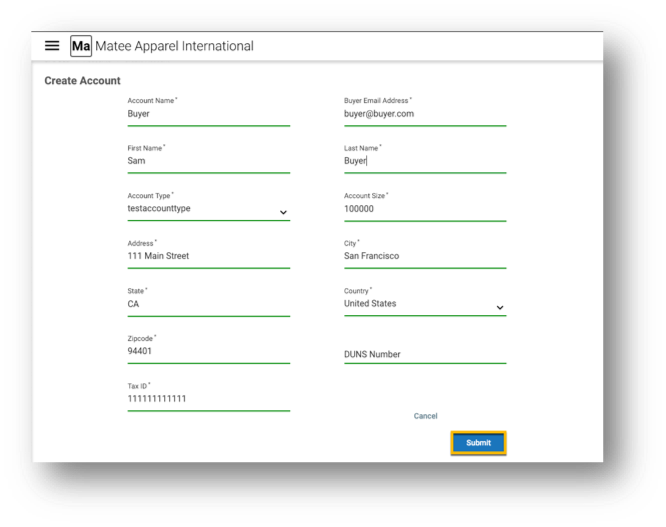
Create Accounts
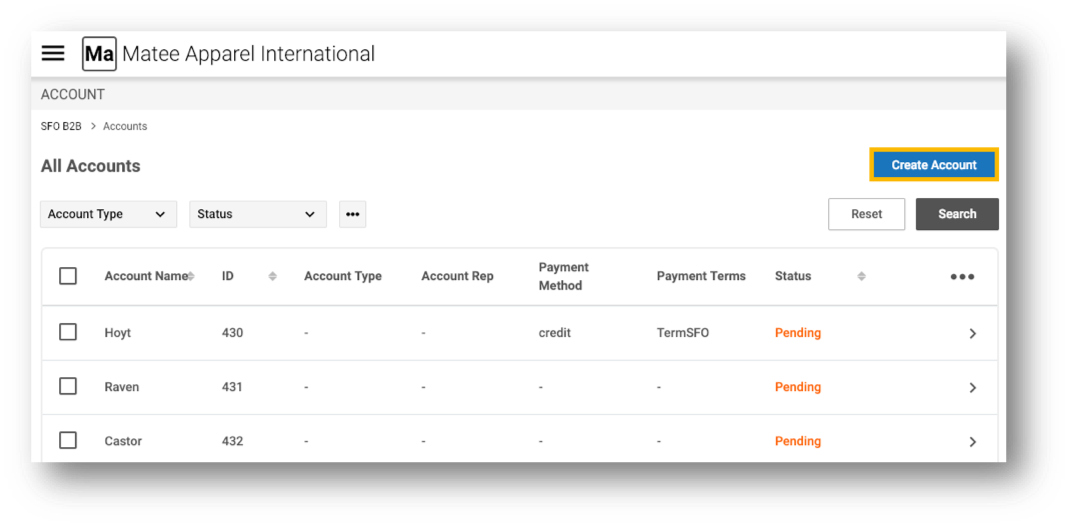
- Click the Create Account button at the top of the Accounts Console to create a new account.
-
Complete the Create Account screen fields (listed below), all of which are required* unless otherwise noted:
- Account Name* - buyer (business) name
- Buyer Email Address* - buyer admin's email address
- First Name* - buyer admin's first name
- Last Name* - buyer admin's last name
- Account Type* - configurable by the Business Admin to allow the clients to segment their buyers (for example, Agriculture, Hospital, Computer, etc.) for promotional and other purposes
- Account Size* - buyer's company size (reflects the possible number of shoppers from the buyer)
- Address*- buyer's street address
- City* - buyer's city
- State* - buyer's state
- Country* - buyer's country
- Zipcode* - buyer's zip code
- DUNS number (optional) - buyer's unique nine-digit identifier from Dun and Bradstreet
- Tax ID* - buyer's federal tax identification number
- Click the Submit button when done.
-
There are four screens (in a tabbed display) of configurable Accounts information available during the creation process:
- Overview
- Contract
- Orders
- Customers
-
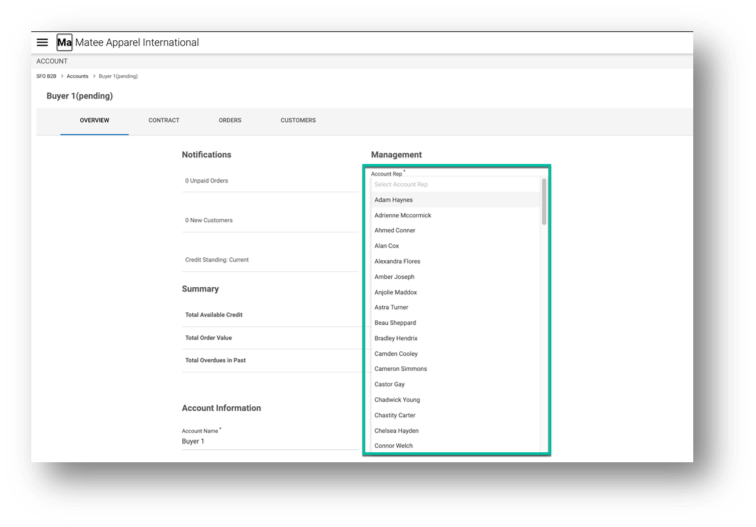
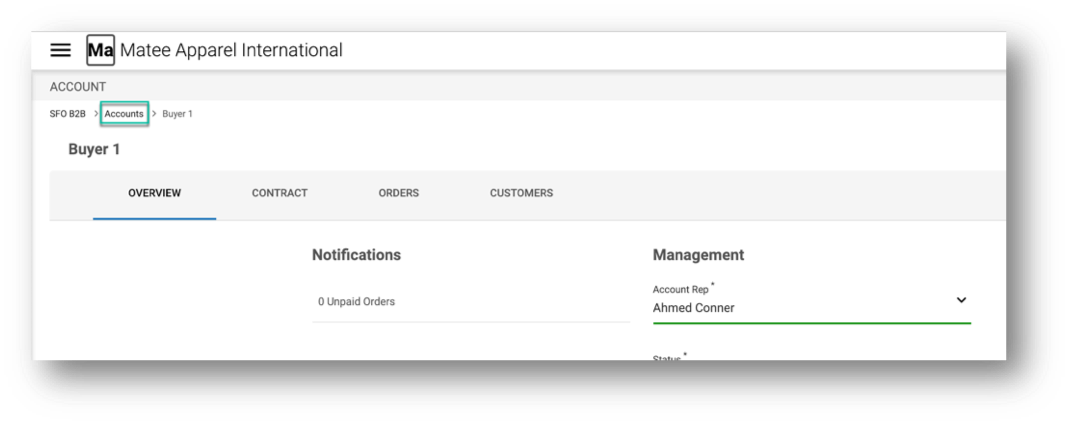
Upon Account creation, the Accounts Manager will be redirected to the account Overview tab for the newly created Account. The tab contains the following sections and editable fields, all of which are required* unless otherwise noted:
-
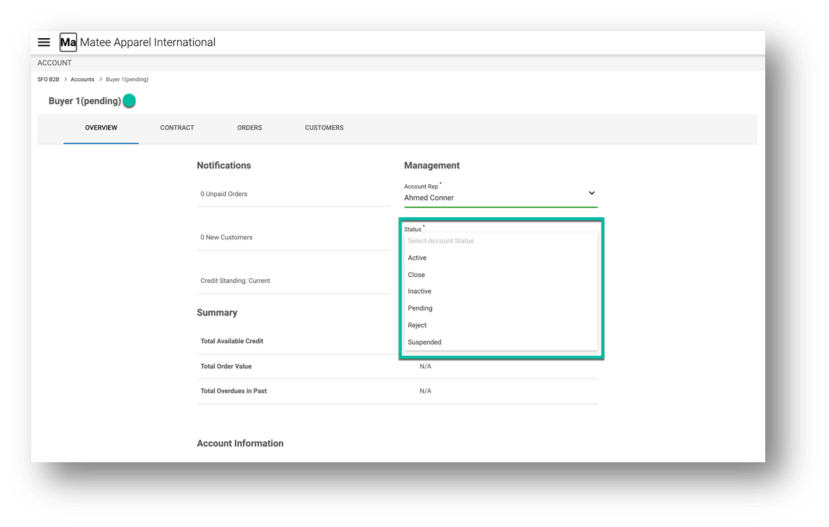
Management
- Account Rep* - seller's account representative for the buyer's account
-
- Status* - status is set to
pending upon account creation, but status can be changed to any of the following
options:
- Active - the account is active and the products can be sold.
- Close - a request for hard delete of the account data has been made and no purchase can be made.
- Inactive - the seller and buyer are no longer doing business and no purchase can be made.
- Pending - the account has not been fully activated and no purchase can be made (the default status).
- Reject - the account request can be rejected if the buyer organization doesn't meet terms & conditions.
- Suspended - the account payment is overdue from the buyer and no purchase can be made while the account is in suspended status.
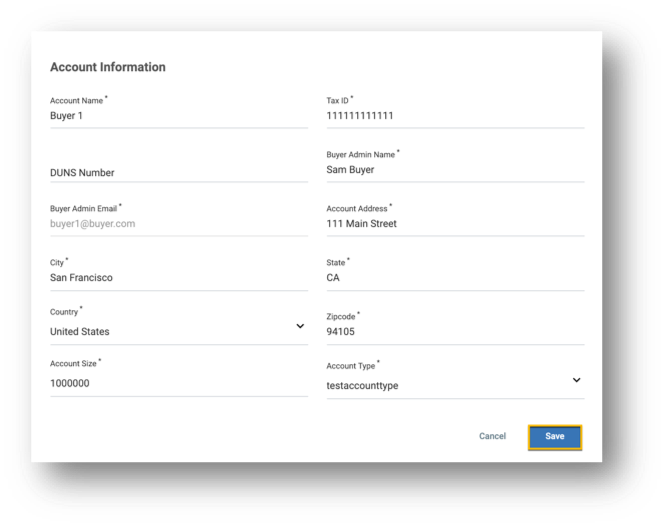
- Account Information - input is required* for the
following editable fields, unless otherwise indicated:
- Account Name* - buyer name
- Tax ID* - buyer's federal tax identification number
- DUNS number (optional) - buyer's unique nine-digit identifier from Dun and Bradstreet
- Buyer Admin Name* - buyer admin's name
- Account Address* - buyer's street address
- City* - buyer's city
- State* - buyer's state
- Country* - buyer's country
- Zipcode* - buyer's zip code
- Account Size* - buyer's company size
- Account Type* - configurable by the Business Admin to allow buyers to segment their customers
Note: The buyer admin's email address is NOT editable.
-
Click the Save button at the bottom of the screen to save your changes.
- Click the Contract tab to edit Contract details for the Account.
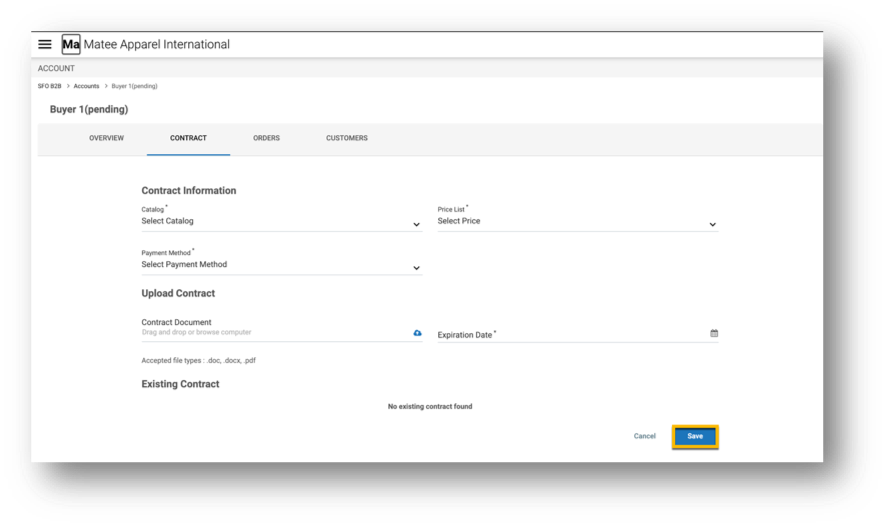
-
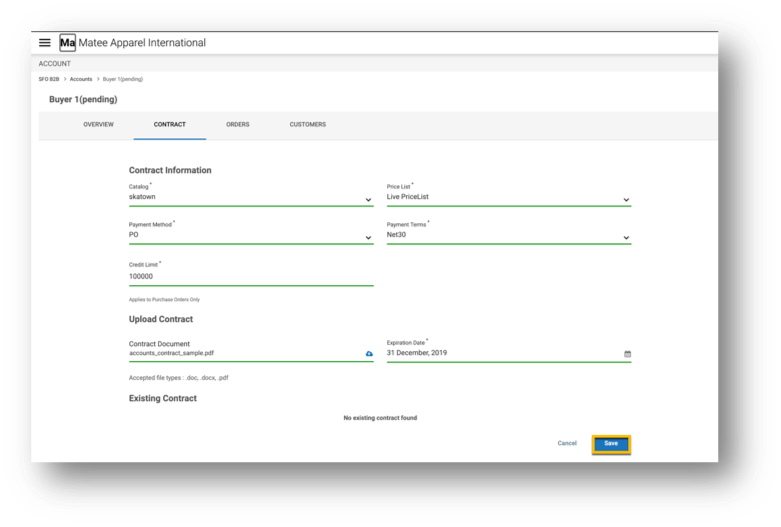
The Contract tab contains the following sections and editable fields, which are required* unless otherwise noted:
- Contract Information
- Catalog* - a dropdown containing sales catalog created by a Catalog manager
- Price List* - a dropdown containing price lists created by a Pricing manager
- Payment Method* - a dropdown containing payment method options (for example, PO, Credit Card, etc.) configured by a Business Admin
- Payment Terms* (appears after payment method is selected) - a dropdown containing payment term options (for example, Net30, Net45, etc.) configured for the business
- Credit Limit* - represents the maximum purchasing limit of the buyer, which is reduced by any outstanding purchases.
- Upload Contract
- Contract Document (optional) - an electronic version of the buyer and seller contract can be uploaded (one at a time) from a local drive
- Expiration Date* - current contract expiration date
- Click the Save button when done to save any changes.
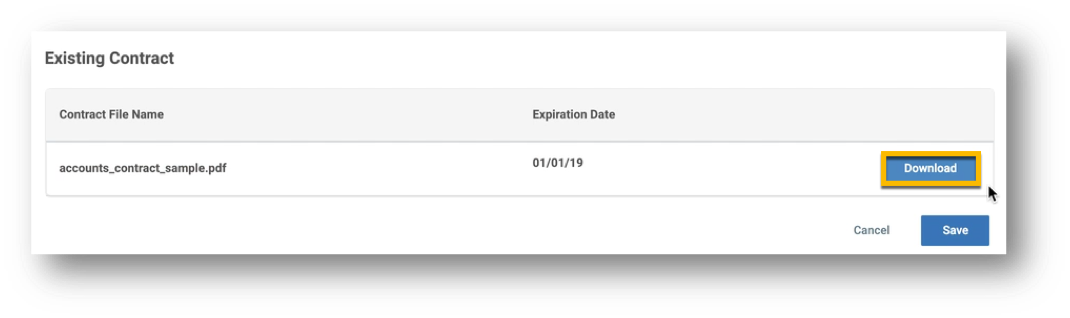
- Contract Information
Note: Once uploaded, the contracts can be downloaded by clicking the Download button to the right of the contract under the Existing Contract section.
-
The Orders tab contains a complete list of orders made by all buyers.
- As with other Accounts screens with row data, the contents can be searched, sorted, and exported by an Accounts Manager.
-
The Customers tab contains a complete list of the business' buyers.
- As with other Accounts screens with row data, the contents can be searched, sorted, and exported by an Accounts Manager.
- Click the Accounts option in the breadcrumb at the top left of the ACCOUNT screen to return to the home screen of the Accounts Console.

View/Edit Account Details
-
Depending upon the Status set for the account, there will be either an " > " to the right of an account at the end of its row or an Edit button when you hover over the account on the Accounts home screen.
-
Click the " > " or the Edit button for the desired account to view or edit its details, including the Account overview as well as its contract, order, and customer details.
-
See the Create Accounts section above for details about working with the Account Information tabs.
-
Click the Accounts option in the breadcrumb at the top left of the ACCOUNT screen to return to the home screen of the Accounts Console.
Revision History 2018-12-28 | PLK - Page created and content uploaded.